Showing posts with label 3D art. Show all posts

Thursday, November 15, 2018

Prometheus

This week we continued working on the proxy model for Prometheus and the temple. I created her proxy model and worked with Zack, our Art Director, to finalize any last details on her 2D concept.
I also assisted environment in lighting the scene and worked a bit more on my toon shader test.


Monday, October 15, 2018

3D Class Week 08 Working in a Game Engine With Final Prop

This week we continued with our cannon prop and importing it into a game engine. We used Unreal to import our prop and and connected the textures in order to make it's material.

I finished painting my cannon in Substance Painter:


UV map:


Iray Render:


After painting, I exported the texture maps from Substance and the low poly Game model from Maya to import them into Unreal. Once I imported the model, I connected the texture maps to the materials by editing the nodes to get the desired affect I wanted. 


Final Cannon: 


Monday, October 8, 2018

3D Class Week 07 Bake Maps and Digital Painting for a Prop

This week we took our cannons we've been working on and created texture maps in Substance Painter.

My original cannon Sculpt from last week was not to my satisfaction, so I scrapped it and did it again:


Once I was able to export the sculpt, I brought it into Substance Painter and proceeded to create my textures:


Monday, October 1, 2018

3D Class Week 06 UV and Digital Sculpting for a Prop

This week was a continuation of last week's assignment where we built a cannon.

First, I needed to build a UV map. I started off by cutting my UV's using a camera view in the UV editor:


After cutting up the UV's for my cannon mesh, I then laid out the UV Shells after unfolding and optimizing them. I used a padding of 4 pixels around my UV's so they wouldn't overlap and give me room to texture later:


I then built a high resolution version of the cannon in Maya by adding more geometry to the edges:


After creating the High Res version of the model, I exported it as an OBJ into Z Brush for sculpting:


Monday, September 24, 2018

3D Class Week 05 Modeling A Prop

This week we were tasked with modeling a prop Cannon in Maya and importing into Unreal (UE4).

I first set up my scale and then set to creating the proxy for this Cannon using image planes to guide my sculpting.


Duplicating mesh to create instances: 


Mesh cleanup and reducing faces:


Once in UE4: I was able to add a collision so the player doesn't clip through the mesh of the Cannon:


Imported into UE4:


Final Wire Frame Render:


Monday, September 17, 2018

3D Week 04 Lego Project Part 02

This week consisted of the second half of building our class Lego project based on the Lord of the Rings. Being part of nature team, there weren't many bricks to build and so all we needed to take care of was cleaning up our bricks and building their LODs.

So, I started with taking my Boulder brick and re-topologizing it to have cleaner edges.


I was tasked with making a low and high poly version of the brick in order to create the LOD to export to UE4. 

Low Poly Version has 533 Faces:


High Poly Version has 645 Faces: 


I then created the LOD group in Maya and exported as an FBX to import into UE4. Once in UE4, I was able to create an instance of the basic lego material and rename it for the boulder and alter the color specs. Once I finished with the material instance, I started staging them in the scene. 


Current/Final placement of the Boulders used in dress setting:


Monday, September 10, 2018

3D Week 03 Lego Project Part 01

This week we got together as a class and broke into teams in order to create assets for an Unreal Lego Model from a location in The Lord of the Rings franchise. I'm part of the Nature team, so we're tasked with mostly modeling the terrain. My chosen unique Lego model is a boulder. They're stats set them at 4x4x3 Lego bricks. 

In order to build my brick, I imported a pre-made mini-figure and prongs from out Unreal Lego Library to assist me in scale. They're aren't many photos of this piece online so i didn't have much reference to go off of, but, I think I got the molding on the boulder pretty close. I started by making a cube with 4x4x4 subdivisions and then adjusted the edges to fit the profile. 


I then just went at it by pushing and pulling vertices. I made sure to clean up my mesh and went back in and modeled my own prongs.


Here's the completed mesh:


After completing the model, I went ahead and imported it into our library. Here it is in the scene. There's a couple bugs regarding textures, but, I figure once the UV's are done, that should clear up any issues. 


Monday, September 3, 2018

3D Week 02 (Minecraft-ish Level)

So, this week I'm tasked with creating a Minecraft level inspired piece using cubes I created and edited with Maya. I then had to texture them in Photoshop and Import them into UE4.

So, first up was creating my cube. It needed beveled edges and proper UV mapping in order to apply textures and shaders to it. I created my textures in Photoshop and then made sure they were lined up properly with the UV's in Maya.


I then went ahead, after making all of my textures, into Unreal Engine and imported my assets. Once done, I went and created my materials in order to apply to the cubes.


Using the materials I made, along with the cubes they were applied to, I created a scene, lit it, and added a fire and fog effect.


Monday, August 27, 2018

First 3D Art Project

3D Week 001 Assignment (UE4 Simple Box Level)

So, this week I'm tasked with creating a simple cube in Maya and then importing it into Unity to create a scene. Here's my breakdown:

First off, I grabbed my mannequin off of Unity to import into Maya for scale. This guy's pretty huge and since scale is an important factor between programs, I needed to make sure I scaled my assets properly at the start of the project. This Mannequin is about 6 feet tall, so I scaled my block to about a third of a foot.


Thanks to proper scaling, I was able to make a quick cube with beveled edges. It's a 10X10X10 unit cube with beveled edges at a subdivision of 3.


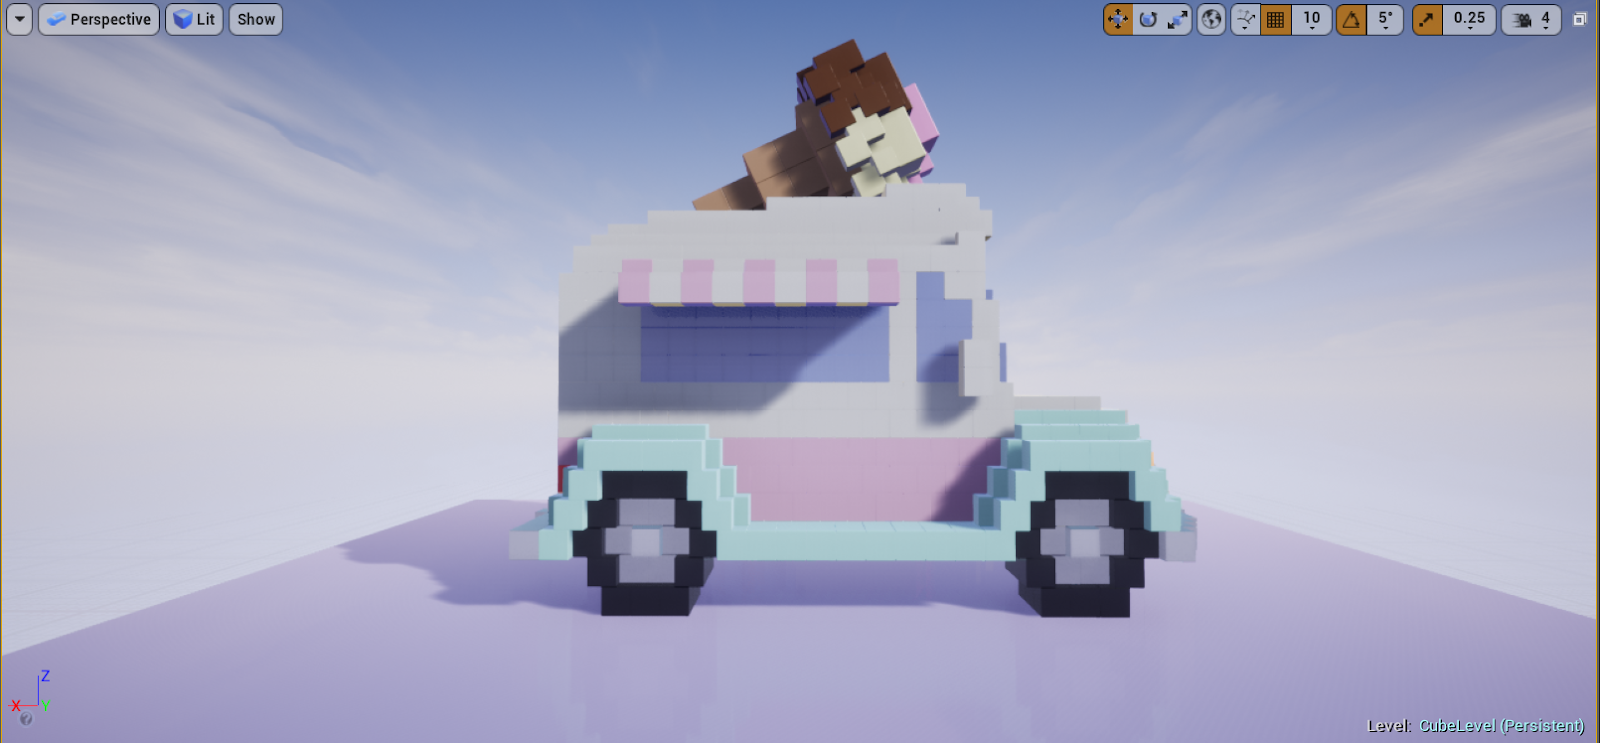
Once I had my cube, I was able to then open up Unreal and import the asset in.  I created a new level and saved my project in case of any future crashes. I decided I wanted to make an Ice Cream Truck with my cubes. I figured to tackle this project the way I would modeling in Maya, so, I built one half of the truck first. 


After completing one side of the model, I then grouped all the poly for the one side and so translated the group to create a new copy of the group. Then I went ahead and Transformed the group to mirror across the Y-axis so I would have the left side of the truck.


I built a quick and simple model of an ice cream cone to put on top of my truck. I built it to the side of my main model and then rotated and translated it into place. 


I then went ahead and created a quick procedural material. I created instances from this material and varied them to achieve the colors I wanted to use. I then went about selecting my cubes and assigning materials to them. 


After Changing up the colors in the instances, I went back in and detailed them a bit more to have the texture I wanted each one to have. 


Side Shot:


Back shot:


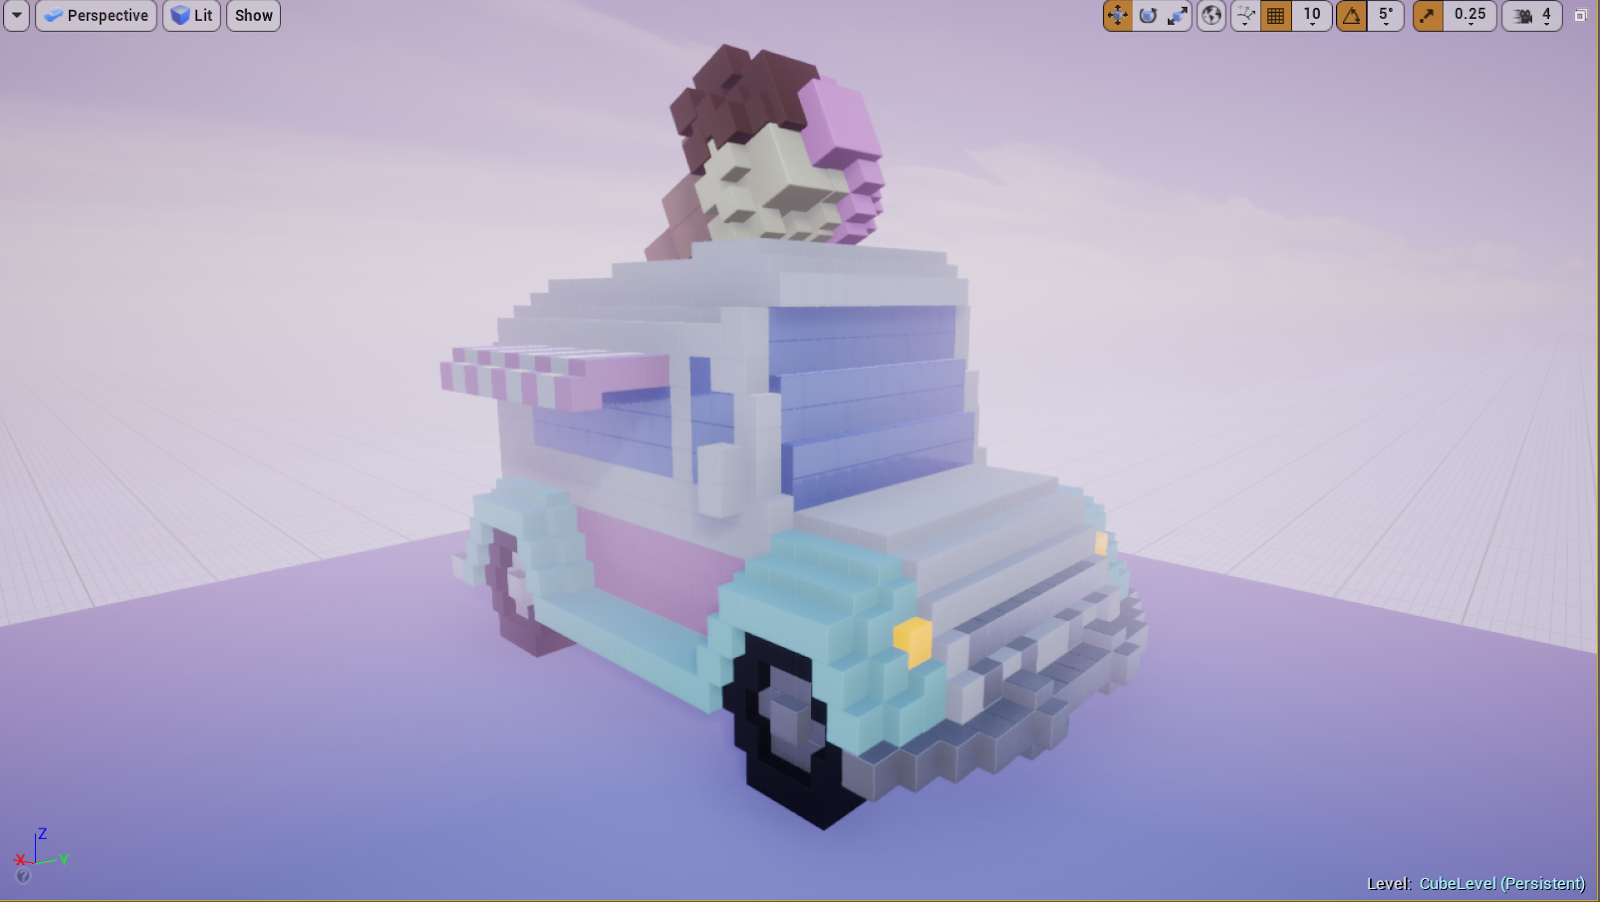
I went in after the materials were done and added a bit of fog to give a candy-cotton vibe. I tinted it a peach-pink. 


AFter messing around with the fog, I then went and added a couple light sources to add dynamics to the scene. 


Finally, I decided to revisit the ice cream cone and added some emission to the ice cream to make it glow. Final Front angle:


Final Back Shot:


Final Side Shot:


Top-down: